

Are you tired of wearing the same old denim? Want to add a personal touch to your wardrobe without breaking the bank? Look no further than DIY denim customization! With a little creativity and some basic supplies, you can transform your denim pieces into unique and stylish statement pieces. In this article, we will share tips, tricks, and inspiration for customizing your denim using simple techniques and materials. So, grab your scissors and let’s get started!
1. Bleaching Techniques: Lighten Up Your Denim
Bleaching is a great way to add an edgy and vintage-inspired look to your denim. There are several different methods you can use, depending on the type of bleach and desired effect. Here are some ideas to try:
1.1 Basic Bleaching Technique
To achieve a classic bleached look, you will need bleach, a spray bottle, and rubber gloves. Fill the spray bottle with equal parts bleach and water. Put on your gloves and lay your denim piece on a flat surface. Start by spraying the bleach mixture onto the fabric, making sure to cover all areas evenly. You can also create patterns by using stencils or tape to block out certain areas before spraying. Once done, let the bleach sit for 10-15 minutes, then rinse with cold water and wash as usual.
1.2 Reverse Bleaching Technique
For a reverse bleached effect, you will need a dark-colored denim piece, bleach, and a spray bottle. Lay the denim on a flat surface and squirt bleach onto it in random spots. Let the bleach sit for 5-10 minutes, then flip the denim over and repeat the process on the other side. Rinse with cold water and wash as usual. This technique creates a cool, tie-dye-like effect that looks great on light-colored denim.
1.3 Ombre Bleaching Technique
For a trendy ombre effect, you will need bleach, a spray bottle, and a large bucket of water. Dip the bottom of your denim piece into the bucket of water, then carefully remove it and lay it flat. Fill the spray bottle with bleach and spray along the bottom edge of the fabric. As the bleach drips down, it will create a gradual lightening effect. For a more defined ombre, use a sponge to apply bleach in a sweeping motion from the bottom up.
2. Distressing Techniques: Ripped and Shredded Denim
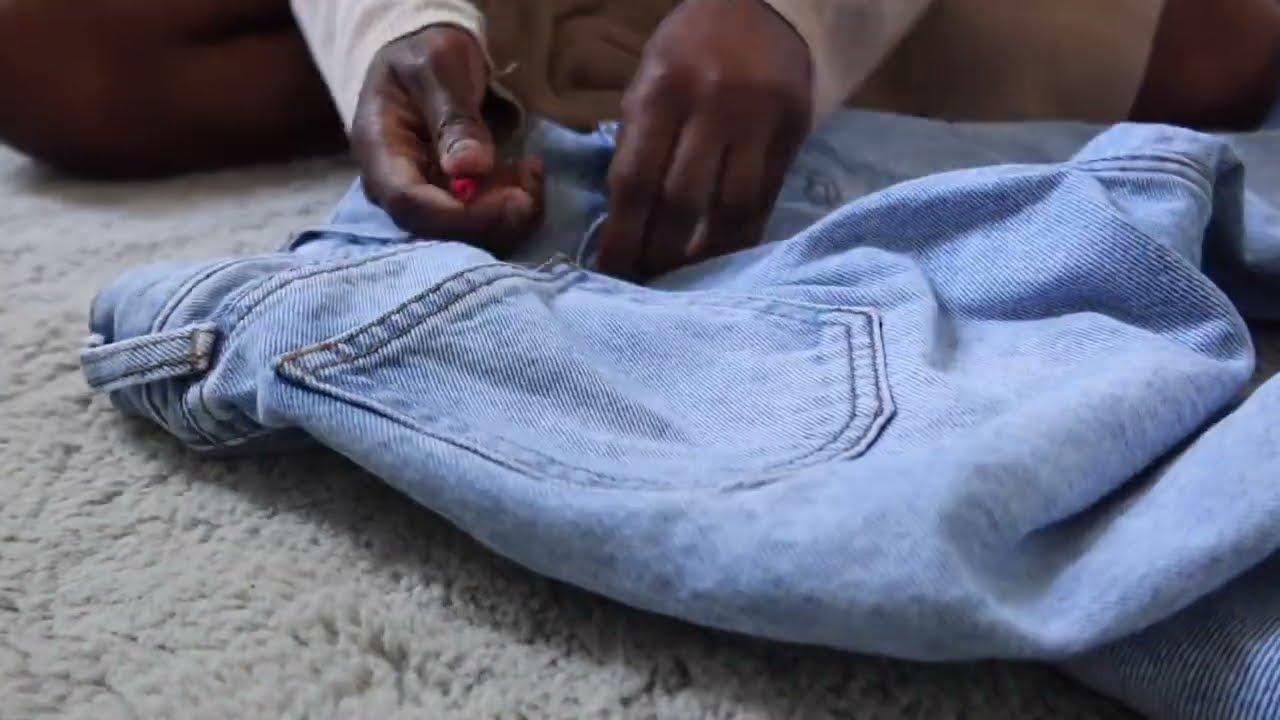
Distressed denim is a classic trend that never goes out of style. The best part? You can easily achieve this look at home using simple tools like scissors, sandpaper, and tweezers. Here are some ideas to get you started:
2.1 Frayed Hem
To create a frayed hem, start by cutting off the bottom of your denim piece to the desired length. Then, use a pair of tweezers to pull out the white threads along the cut edge. This will create a frayed and textured look that is perfect for a casual and worn-in vibe.
2.2 Ripped Knees
Ripped knees are a popular look for distressed denim. To achieve this, put on your jeans and mark where you want the rips to be with chalk. Take off the jeans and use a pair of scissors to make horizontal cuts along the marked lines. Then, use sandpaper or a cheese grater to rough up the edges. For an even more worn-in look, use tweezers to pull out any vertical threads around the rip.
2.3 Shredded Denim
For an edgier look, try shredding your denim. Start by making horizontal cuts across the fabric. Then, use scissors or tweezers to pull out the white threads between the cuts. You can create as many or as few strands as you like for a custom shredded effect.
3. Embellishment Techniques: Adding Sparkle and Shine
Embellishing your denim is a great way to add a touch of glam to your wardrobe. Whether it’s adding patches, sequins, or studs, there are endless ways to customize your denim with embellishments. Here are some ideas to try:
3.1 Patchwork Denim
Patchwork is a fun and easy way to add color and personality to your denim. You can use patches with pre-made designs or opt for iron-on letters and shapes to create your own unique design. Simply place the patches where you want them, and follow the instructions on the packaging to secure them onto your denim.
3.2 Sequin Detailing
For a touch of sparkle, try adding sequins to your denim pieces. You can sew them on in a specific pattern or simply sprinkle them randomly for a more boho-inspired look. For a more subtle effect, choose sequins in a similar color to your denim. If you’re feeling extra creative, you can even create your own sequin designs using fabric glue and loose sequins.
3.3 Studded Denim
Studs are a great way to add an edgy and rocker-chic vibe to your denim pieces. You can purchase pre-made stud strips or buy individual studs and place them wherever you like. Use a hot glue gun to secure them onto your denim, or invest in a stud-setting tool for a more permanent hold.
4. Dyeing Techniques: Color Your Denim
Dyeing your denim is an excellent way to breathe new life into old pieces. There are various dyeing techniques you can try, depending on the type of dye and desired effect. Here are some ideas to get you started:
4.1 Dip Dye
The dip dye technique is a fun and easy way to add a pop of color to your denim. You will need fabric dye, a bucket, and rubber gloves for this method. Fill the bucket with hot water and mix in the fabric dye following the package instructions. Dip the bottom of your denim piece into the bucket, making sure to leave the top portion untouched. The longer you leave it in, the darker the color will be. Once done, rinse with cold water and wash as usual.
4.2 Tie-Dye
Tie-dye is a classic technique that can create vibrant and unique patterns on your denim. There are many different methods for tie-dyeing, but one simple way is to gather your denim and secure it with rubber bands before applying the dye. This will create a cool spiral or circular pattern. Follow the package instructions for mixing and applying the dye, then rinse and wash as usual.
4.3 Reverse Dye
To achieve a reverse dye effect, you will need bleach, fabric dye, and rubber gloves. Start by bleaching your denim using one of the techniques mentioned earlier. Once dry, follow the instructions on the fabric dye to create your desired color. This method creates a cool, tie-dye-like effect on dark denim.
5. Tips and Tricks for Successful DIY Denim Customization
- Always perform a patch test before attempting any dyeing or bleaching techniques to ensure the color and material react well.
- Use old towels or plastic sheets to protect your work area from any spills or messes.
- Wear gloves and protective clothing when working with bleach or dye to prevent skin irritation.
- When distressing your denim, start small and gradually increase the level of distressing until you achieve your desired look.
- Mix and match techniques for a truly unique and personalized denim piece.
6. Inspiration: DIY Denim Ideas to Get You Started
- Embellish your denim jacket with patches, studs, and sequins for a one-of-a-kind design.
- Create an ombre effect on your denim shorts using the bleaching technique mentioned earlier.
- Add fringe to the bottom of your denim skirt for a boho-inspired look.
- Use fabric dye to create a galaxy or tie-dye pattern on your denim overalls.
- Cut off the sleeves of a denim shirt and add lace detailing for a feminine touch.
FAQs
1. Can I bleach black denim?
Yes, you can bleach black denim. However, the results may vary depending on the type of fabric and bleach used. It’s always best to perform a patch test first.
2. How do I fix a mistake while customizing my denim?
If you make a mistake while customizing your denim, don’t worry! You can try covering it up with patches, adding more distressing, or even cutting off the affected area and turning it into a new design element.
3. Can I use food coloring to dye my denim?
Food coloring is not recommended for dyeing denim. It may not produce the desired color and could potentially stain your denim.
4. How long does it take for the bleach to lighten my denim?
The amount of time it takes for the bleach to work will vary depending on the concentration of the bleach and fabric. Start by leaving it on for 10-15 minutes, then check the color. If you want a lighter shade, leave it on for a few more minutes.
5. Will the dye fade after washing?
It’s normal for some dye to wash out after the initial wash. To prevent this, make sure to rinse your denim thoroughly before wearing and follow the instructions on the dye packaging for setting the color.
Conclusion
DIY denim customization is a fun and budget-friendly way to add a personal touch to your wardrobe. With these tips, tricks, and inspiration, you can easily transform your denim pieces into unique and stylish creations. So, go ahead and unleash your creativity with DIY: Customizing Your Denim!